I'm very excited to share the results of my latest furniture makeover with you all :) As I mentioned on Friday, after a long and fruitless search for a suitable and reasonably priced storage unit for our dining room (aka my craft room) I finally realised that I could use the Ikea Expedit bookcase that was lurking in our loft.
I searched around online for some bookcase upcycling inspiration because there was no way I was letting something that black and boring into my bubblegum-pink room of crafty goodness. After spotting this genius makeover on Apartment Therapy I knew there was hope for the bookcase after all.
I don't know why I didn't think of it sooner to be honest. After all, I've decoupaged furniture before... Before I share the eye-popping result, let me remind you of the "Before":
| YAWN. |
I took the bookcase apart* and then covered each individual section in a layer of PVA and something pretty. The something pretties included:
- wrapping paper (from Paperchase, Ikea and Tiger)
- craft paper (some from Tiger, and some left over from a Christmas present)
- maps of Hungary, Ashdown Forest and South Africa (from Oxfam)
- washi tape (from Etsy and Tiger - are you sensing a pattern here?)
- a mirror (left over from another quick-fix DIY project that I'm going to share later in the week)
- Pages from Mollie Makes and Harpers Bazaar magazines
- comic books (old ones from the local flea market. Perhaps should have checked they weren't rare first editions before tearing them up... Oh well.)
- a still-life oil sketch from my GCSE artwork
- a postcard from last year's jaunt to London
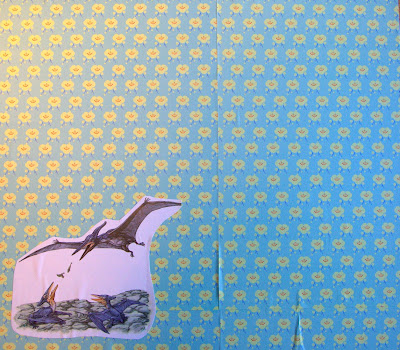
- a dinosaur book (from Oxfam). Yes; you read that correctly. I AM A MONSTER and have defiled a children's book by snipping it up. Shame shall be heaped upon my family and I will no doubt be struck down by the God of Literature, whomever that may be. Richard and Judy, perhaps? I bought the book purposefully for cutting it up and figured if I helped starving people in Africa by buying it, it may lessen the anger directed at me by The Rest Of The Internet; who hate people cutting up books/melting terrible 90s records to turn them into fruit bowls.
Covering all of the shelf-type surfaces took me approximately sixty billion years. It's incredible I fitted it all into one weekend, really. But, I did it. And I think it is beautiful, despite the fact that I could not get any of the surfaces to remain completely air-bubble free. Stupid air. What do you think?
Katie xxx
P.S. Apologies for the shoddy photos- it was getting dark when I'd finished but I just couldn't wait to share :) I'm hoping to take some new pics during daylight hours this week to replace the ones above.
*OK; Tom did it. I supervised, which is just as important.
P.S. Linking up to the lovely Lakota's Ta Dah Tuesday.
P.S. Linking up to the lovely Lakota's Ta Dah Tuesday.


Wehey! It's a masterpiece of colour and design! Inspirational. You do realise you can't put anything into it though, as you'll cover up its beauty! ;)
ReplyDeleteFabulous!
Thank you very much :) I have rather compromised my desire to fill it up with stuff- basically have upped the form but reduced the function. That's got to be some sort of superpower, right? :p
DeleteThat is a brilliant makeover of a rather dull but useful piece of furniture - I love it! Such a shame, my husband would think I'd lost the plot if I did anything similar.
ReplyDeleteThank you very much :) I've worn my boyfriend down over time- he now expects this sort of behaviour from me :p In fact, as he bought me some of the paper I used, I would say he's basically an accomplice!
DeleteThis is blimmin' awesome! Loved all the different papers, especially the map and dinos!
ReplyDeleteThank you very much! I tried to find as many different papers as possible but the best bit is if I get bored I can slap something new over the top :) xx
DeleteYou are a genius!!!!!!!!!!! This is the ultimate bookcase!!!!!!!!!!!!!!!!!xxx
ReplyDeleteThanks Kezzie :) xxx
DeleteLooks great! Well done!
ReplyDeleteIt looks so awesome! I love it. I want to decoupage a bookshelf now!
ReplyDeleteDo it! Simple bookcases like this are so easy to do too- all the surfaces are flat and no fiddly edges :) Although washi tape is definitely a godsend for covering up any less-than-perfect bits xx
DeleteBrilliant! I see no bubbles either ;-)
ReplyDeleteAnd I have no problem with melting LPs, although I am a bit twitchy about books - not that I have a problem with other people doing it, just me. Unless they are actually falling apart.
Haha thanks. I just spotted a huge bubble this morning- have moved something in front of it; now no one will ever know :p I figured the beautiful illustrations would get more exposure and better appreciated if they were out to view all the time instead of closed inside the book. I've got lots left too- so all my friends can expect dinosaur birthday cards this year :p xxx
Delete